Charity Projects
Loose Threads donates to variety of groups.
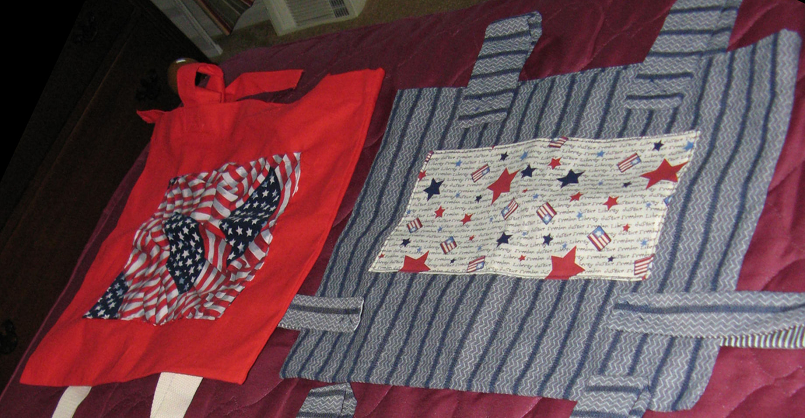
Wheel chair and walker bags- are given to the veterans at the Southeastern Veterans’ Center
One Veterans’ Drive, Spring City, Pennsylvania 19475-1241
We have donated over 175 of these bags. The Veterans’ Administrated fill them with goodies for the men and woman to use and distribute them as part of their Christmas gift.
.
One Veterans’ Drive, Spring City, Pennsylvania 19475-1241
We have donated over 175 of these bags. The Veterans’ Administrated fill them with goodies for the men and woman to use and distribute them as part of their Christmas gift.
.
Pattern Instructions:
Fabric Selections: Cotton twill, poly-cotton blends, upholstery fabric, or any heavier densely woven fabric works best. Sew with 1/2 inch seams.
Cutting Instructions: Cut 2 rectangles 18 x 14 for the front and back. Cut 1 rectangle 18 x 9 for a pocket. Cut 4 rectangles 10 x 6 for the button tabs. Alternately use twill tape or grosgrain ribbon for tying the bag to the walker or wheel chair. Use twice the length for ribbon to allow room for tying.
Finishing the edges: Serger: Serge the edges trimming 1/2 inch as you serge. Fold down 1 1/2 inch and press. Sew with a straight stitch on top of the serged edge for a firm edge.
Non-serged finishing: Fold edges down 1/2 inch and press. Fold down another 1 1/2 inches and press. Sew with a straight stitch on top of the fold.
Pockets: Lay pocket along the bag front; align pocket with the bottom edge and pin. Mark the center line and sew from bottom to top creating two sections. At the top edge of the pocket reinforce the stitching line to prevent the pocket ripping. If you decide to make a second pocket for the back of the bag, the pocket can be divided into 2 sections again, or 3 sections. Three sections would be seamed at 2 1/2 inches from the centerline. Be careful not to make the pockets too deep and narrow making the items in the pocket difficult to retrieve.
Button tabs: Fold the 10 x 6 rectangles in half lengthwise with right sides together. Sew along the long side and across one end. Turn and press. Serge or zigzag the unfinished end of the two tabs. Place these tabs 2 inches in from the side and 1 inch down from the top edge of the back. This should make an 8 inch flap. Make sure they are the same length or the bag will not hang straight. Sew an X on the rectangle for reinforcement. Place the raw edge of the other two tabs 2 inches up from the bottom of the bag and sew to the back.
Final Assembly: Place the front on top of the back, right sides together. Sew the sides and bottom at least twice for reinforcement. Zigzag or serge the raw edges. Sew buttonholes at least 1/2 inch from the end of the tabs. Sew the buttons on the front to match the buttonholes, use stabilizer if necessary.
Caution the recipient against keeping heavy objects in the bag. It may require more energy to use the walker or cause tipping of the walker.
.